

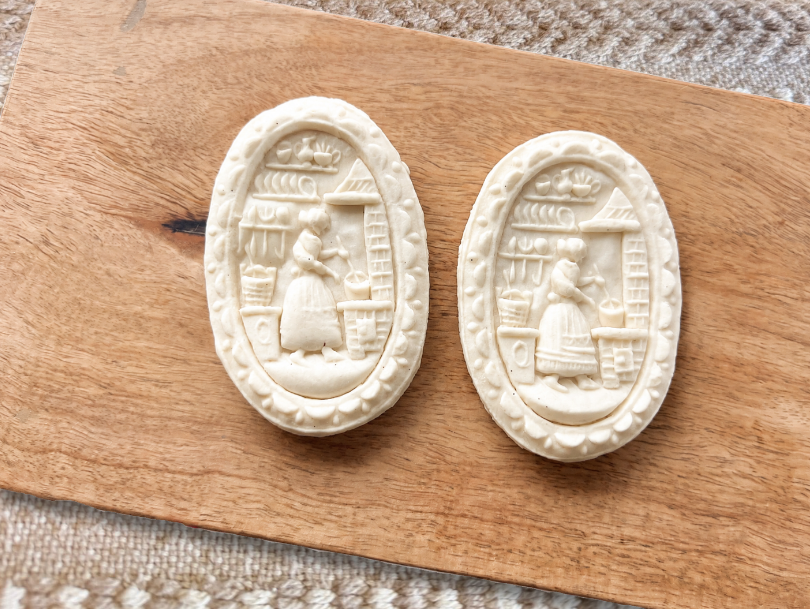
These dense, cake-like cookies date back to at least the 1600's and originated in Bavaria, Switzerland and the Alsace area of France. For eating quality and ease of quality prints, this recipe is just perfection!

Orange Zest Springerle Cookies
These dense, cake-like cookies date back to at least the 1600's and originated in Bavaria, Switzerland and the Alsace area of France. For eating quality and ease of quality prints, this recipe is just perfection!
Ingredients
Instructions
- Dissolve hartshorn in milk in a glass or stainless-steel container (Do NOT use a plastic container) and set aside.
- Beat eggs until thick and lemon-colored (10-20 minutes).
- Slowly beat in the confectioner’s sugar, then the softened butter.
- Add the dissolved hartshorn and milk, salt, orange oil, and grated rind of one orange.
- Gradually beat in as much flour as you can with the mixer, then stir in the remainder of the 2 lbs of flour to make a stiff dough.
- Turn onto floured surface and knead in enough flour to make a good print without sticking.
- Many bakers like to let the dough “rest”. Be sure to wrap the dough well with plastic wrap, or place in a tightly closed plastic bag and store in refrigerator for an hour or overnight.
- Size and liquidity of eggs, flour, and weather humidity can affect your dough. Press the dough with your fingers, IF the dough sticks to your fingers, then you need to add more cake flour to your dough. You may need to use less or more flour than the recipe states.
- To prevent sticking:
- Lightly brush molds with flour using a clean, dry pastry brush before pressing to prevent sticking. If you get too much flour on your cookies- the flour can easily be brushed off of the cookies AFTER BAKING
- Printing Cookies:
- Roll the dough approximately 3/8” to 1/2" thick. Brush with flour on the mold image, then imprint with your press (mold), cut out shape with knife, pastry wheel, or shaped cutter, let dry overnight and bake. If you press a cookie adjacent to another cookie, you may distort the first image, so remember to ”press and cut, press and cut” as you go along.
- Drying: Most printed cookies are dried 8-24 hours before baking (depending on your schedule, humidity, etc.). This preserves the picture during baking.
- Baking: Test bake one cookie first! It saves grief!
- Baking temperatures***: Ovens vary wildly! If your test cookie "over puffs" or tilts, reduce heat, put an empty cookie sheet on bottom oven shelf, or prop the oven door slightly ajar with handle of a wooden spoon to wick off heat. For tiny cookies, you may need the temperature set as low as 200 degrees. In general, the smaller the cookie, the lower the temperature; the larger the cookie, the higher the temperature. See Discussion for Baking Times.
- Bubbles: Flat areas of larger cookies are vulnerable to “bubbles” while baking. Gently and quickly (the cookies are hot) press them down manually and finish baking. Yiu can also press “bubbles” upon removing cookies from the oven
- Salmonella:* Don't worry! Salmonella is killed when exposed to 155-degree heat for even a few seconds.
- Bake on greased or baker's parchment-lined cookie sheets at 275 degrees - 300 degrees until barely golden on the bottom, 10-20 minutes or more, depending on size of cookie. Store in airtight containers, or in zipper bags in the freezer.
- They keep for months, and improve with age. Yield: 3 to 12 dozen, depending on size.
- For special Occasions, you can “Paint” the cookies AFTER BAKING with a few drops of Food Coloring dissolved in 1/2 teaspoon Vodka.
- OR Special Occasion for CHOCOLATE LOVERS: Melt semi sweet or dark chocolate in a double boiler over simmering water. Stir in 1 tsp of orange oil to 12 oz of chocolate. And ice the backs of the cookies after baking. Let the chocolate solidify while the cookies rest on their “faces” So very Delicious!!
- Packaging: I prefer to place individual cookies in cellophane packages and tie with decorative silver or gold twist ties. This protects the cookies from smudging the chocolate or drying out the cookies. The cookies keep VERY well if they are individually wrapped and stored in an air tight tin and placed in the freezer. You can bake them in early November for Christmas giving IF you package and freeze them in this way. As an added bonus to this method. The cookies are ready for instant gift giving! Just take out as many cookies as needed for the occasion. Keeping the remaining cookies in the Freezer until needed.
Notes
Softening Cookies
Should your cookies accidentally harden, put slices of apple on firm bread in with them for a day or more. Watch and change apple slices if needed to prevent mildewing.
Flavor Variations
-Traditional Anise
Use 1 tsp Anise Oil, with optional 1 finely grated lemon rind.
-To make Other flavors
Oil of almond-1 tsp.,
lemon- 2 tsp.,
peppermint – ½ tsp,
Raspberry- 2 tsp.
Vanilla flavor is good- use 3 or 4 teaspoons extract.
Fruit Flavors - Use 2 to 3 teaspoons
-Elegant Finishing Touch
Brush melted sweet or bitter chocolate on the bottoms of baked cookies Adding additional Flavor
OIL to the melted chocolate will greatly enhance the chocolate treat. (NOTE extract with alcohol base will not blend with the oil in chocolate, be sure to use a flavor oil with chocolate) Especially nice on orange, chocolate, or almond-flavored Springerle.